

- An active ClickFlare Account
- An active Bigo Ads Account
-
Bigo Ads authentication credentials:
- Client ID
- Secret
- Refresh Token
Begin the process by:
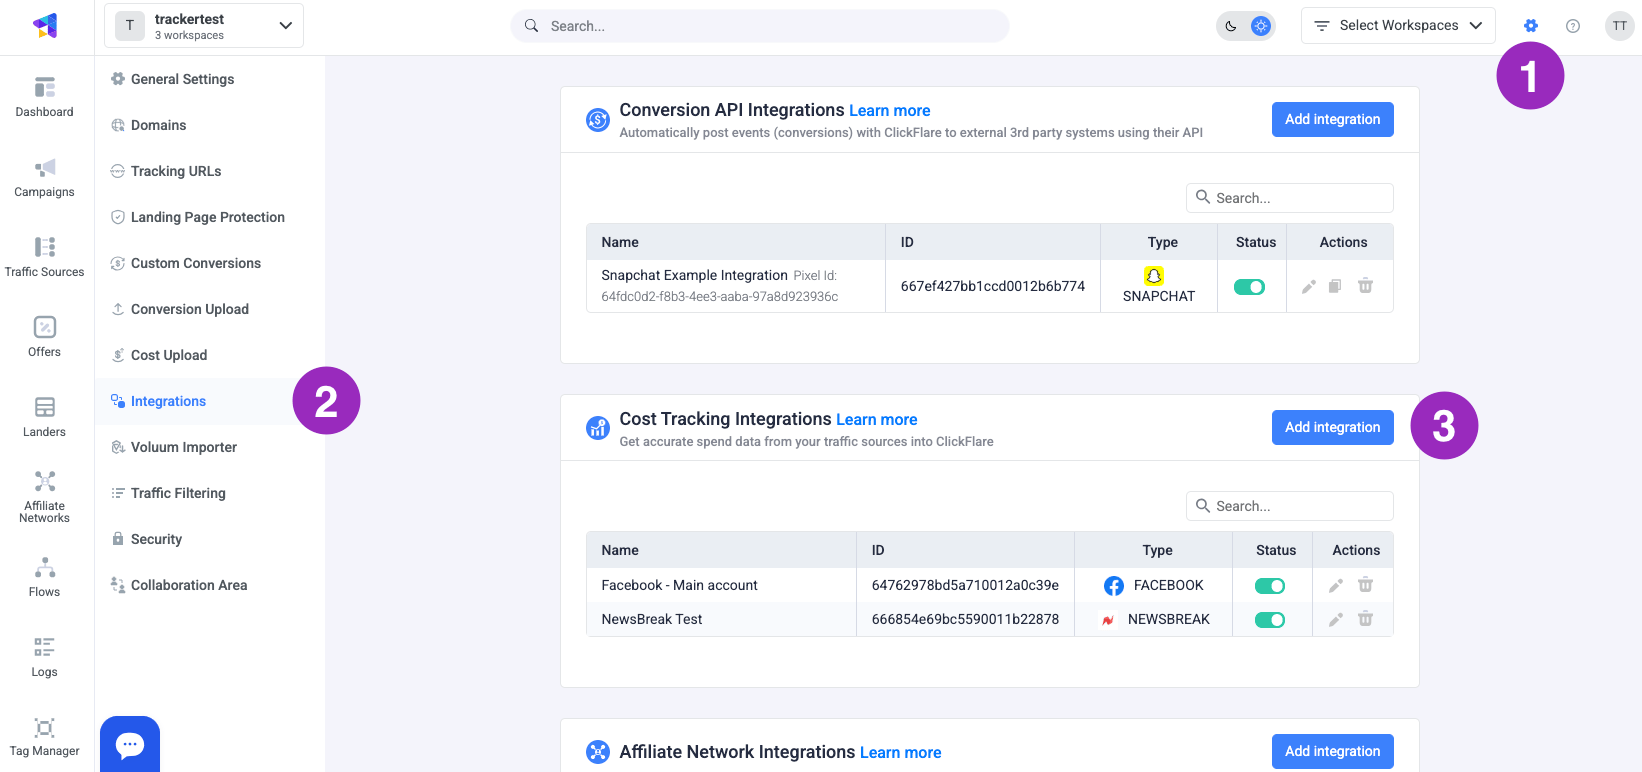
- Accessing the Settings Menu: Enter the Settings Menu (gear icon in the upper right corner) inside ClickFlare.
- Navigating to Integrations: Move to the Integrations Menu on the left side of the screen.
-
Adding a New Integration:
In the Cost Tracking Integrations section, click on Add Integration.
-
Configuring Your Integration:
-
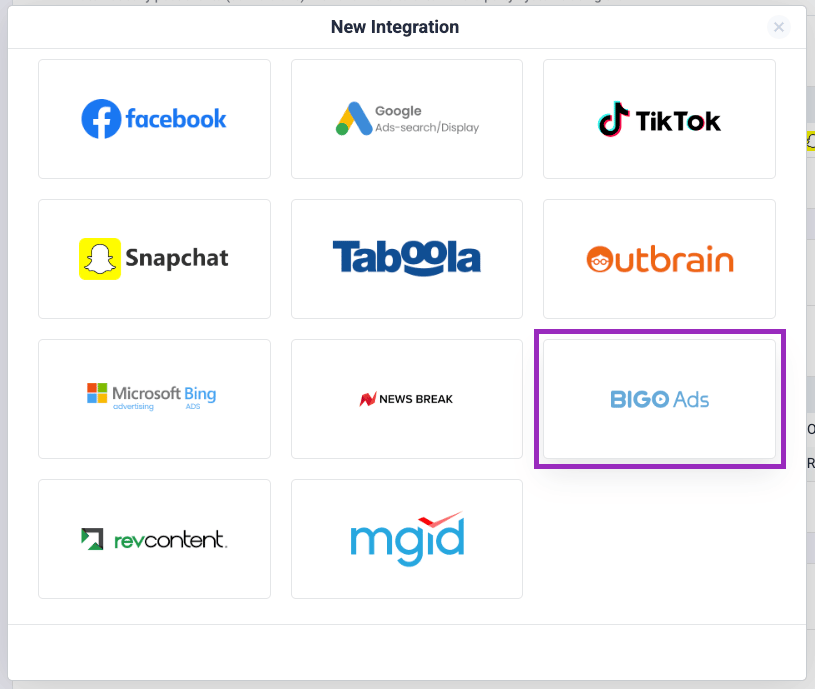
Choose Bigo Ads from the list of available cost integrations
- Now, it’s time to fill in the integration details. First, select which Workspace this integration belongs to (public, where everyone can access it, or a private workspace).
- Next, name the integration. Select a name you will easily recognize later.
- Paste the Client ID, Secret and Refresh Token provided by your Bigo account manager.
-
Select the integration timezone. The timezone should match the one on your Bigo Ads account.
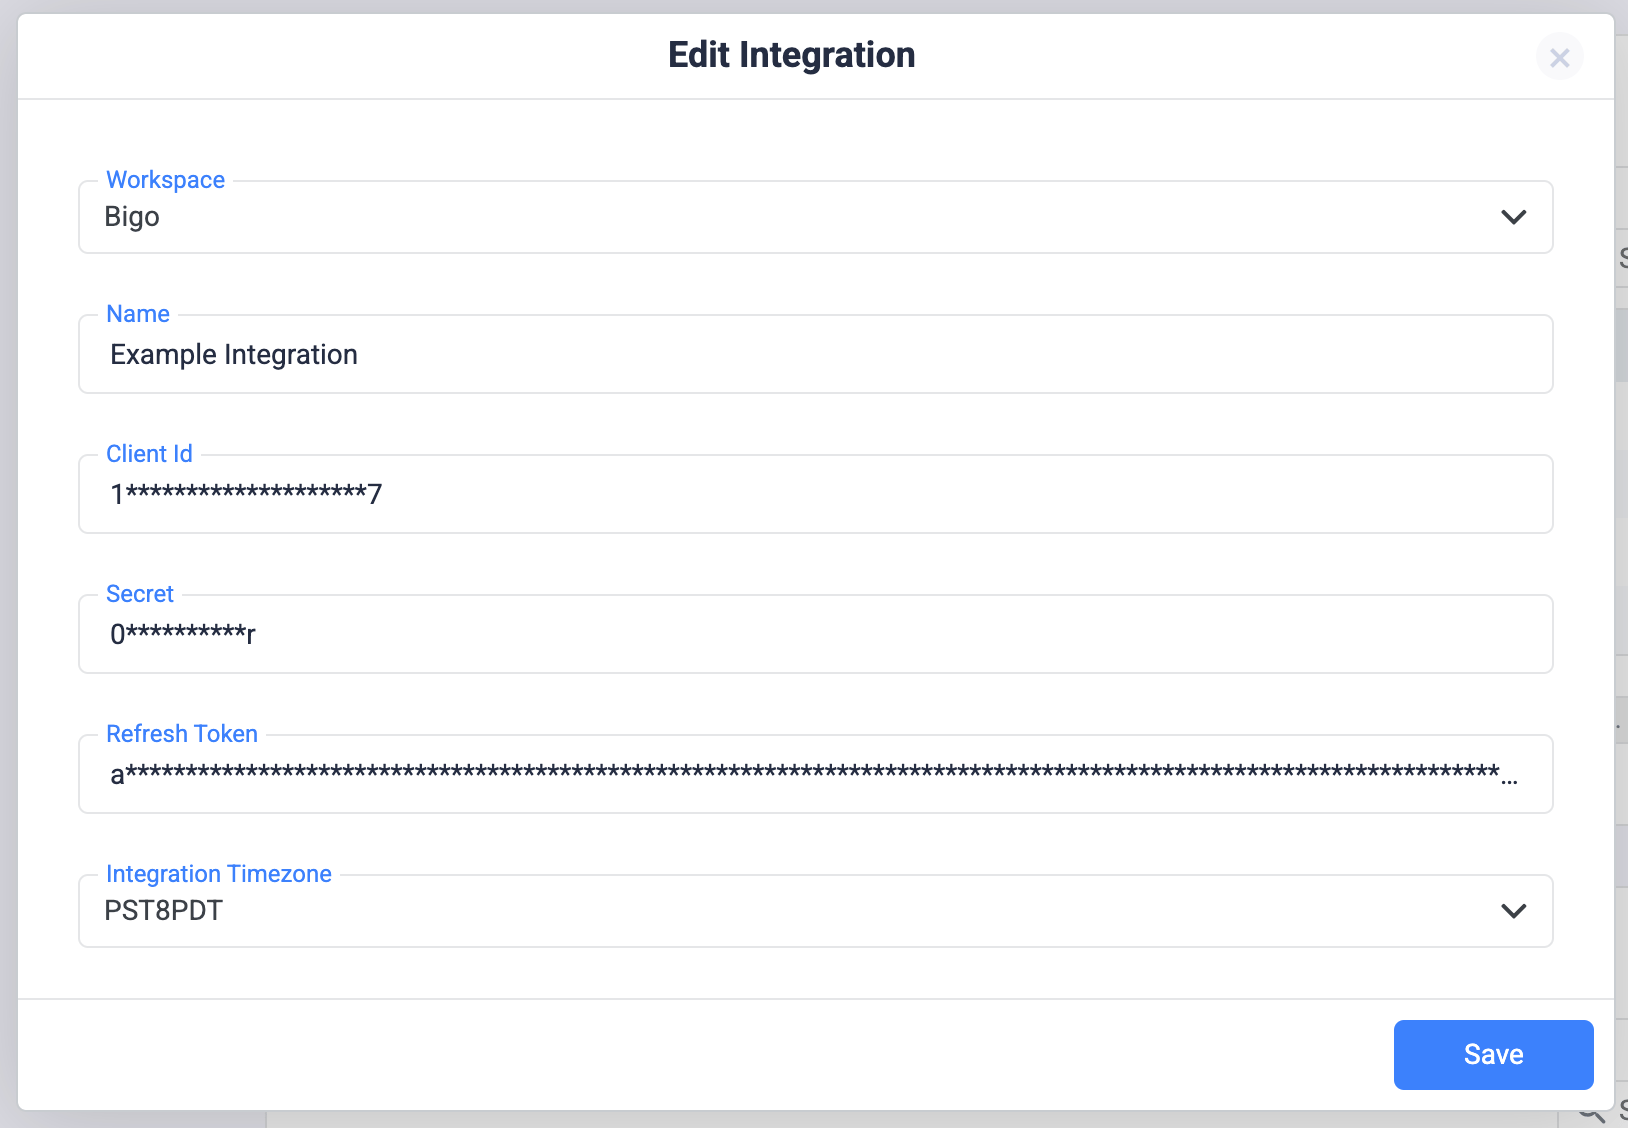
- Click on Save
-
Choose Bigo Ads from the list of available cost integrations
-
Optional Step:
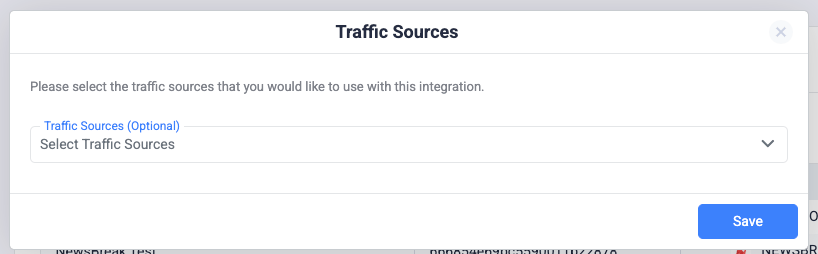
After clicking on save, you have the possibility to select the traffic sources you want to assign this integration to. In case you haven’t created the traffic source, you can just skip this step
-
Finalizing the Integration:
- Once done, click on Save.
- Go to the traffic source configuration settings and add the previously created cost integration under the cost integration settings.
Important Note: Although you created the Cost Integration for Bigo Ads, you still need to add it as a traffic source as well. The Cost Integration will only pull costs, while creating a traffic source is necessary in order to fully track your campaigns on ClickFlare.